Monday, March 4, 2013

Etsymetal Blog Carnival - March 2013, Where Do You Live

Every month my teammates on EtsyMetal choose a theme for our blog posting.  We call this our EtsyMetal Blog Carnival.  For this month, the topic is:
"Where do you live?" 
Physically, mentally, emotionally...
City, state, country; house, apartment, farm; orderly, chaotic, on the edge...
Give us a picture of who you are by showing and telling us where you live, how your surroundings may inspire you...
 
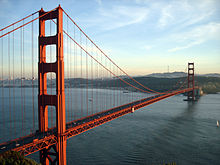
I live in, San Mateo, one of the suburbs in the San Francisco Bay Area, pretty much half way between the city of San Francisco and San Jose.  The 2010 census says that there are 7.15 million people living in communities surrounding the bay.  San Francisco is a very picturesque city, and the streets weave between colorful Victorians in the residential hills as well as through the downtown modern highrises.  Although I'm in the suburb, it's only a 15 min. drive to reach the city limits.  However, it typically takes me 30 minutes to cross town due to city traffic.

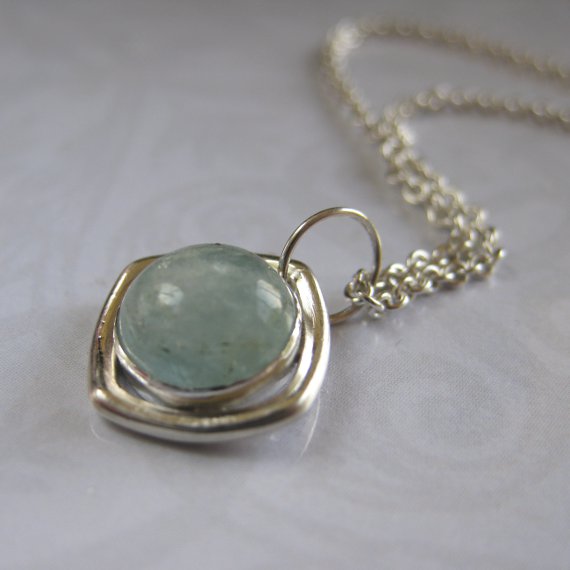
To me, San Francisco is a city of tolerance, a city of ethnic and cultural diversity.  That kind of spirit is very encouraging for the arts.  There's always some events going on each weekend.  We are very lucky to have some of the finest museums in the world.  The current exhibit, which I plan to visit, is the Girl with a Pearl Earring, Dutch Paintings from the Mauritshuis at the de Young Museum in Golden Gate Park.  This puts me in the mood of making pearl earrings.  LOL.

Another museum current exhibit is the China's Terracotta Warriors at the Asian Art Museum.  Some years ago, I went to Xian and saw the excavation pits where these statues were unearthed.  But hey, seeing them again will bring me closer to home, closer to Asia.

In San Mateo, I live in a small house where my studio takes up a portion of the garage.  It's not the prettiest place, and that's why I rely on the attractions in San Francisco to provide me with tons of inspiration.  Having a network of local artist friends is invaluable.  I feel very lucky that I am surrounded by resources.

Hope you enjoy reading the other team member's blog posts on the same topic: 
1. Lou Hunter: http://peculiarforest.blogspot.ch/
2. Laura Jane Bouton: http://laurajanebouton.blogspot.it/
3. 2Roses: http://www.jewelrytutorial.blogspot.com
4. Inbar Bareket : http://www.inbarbareket.info/blog/
5. Laney Clark: http://www.silentgoddess.blogspot.com
6. Abella Blue: http://www.abellablue.com/blog
7. Cynthia Del Giudice: http://www.cynthiadelgiudice.blogspot.com
8. Rebecca Bogan: http://adobesol.wordpress.com/
9. Erin Austin: http://metalmusing.blogspot.com/
10. Deborah Lee Taylor http://www.e5jewelryblog.com
11. Anne Walker: http://creativeinclinations.blogspot.com/

Monday, January 7, 2013

Etsymetal Blog Carnival - January 2013, New Year's Resolutions

It's EtsyMetal's Blog Carnival again.  The team chooses one topic that we would write about for the first Monday of the month.  This month's topic is "New Year's Resolutions".  I want to recap this past year and what I had learned, where it had taken me, and where it would take me in 2013. 

2012 was an exciting year, exploring different techniques and participating in many new shows.  The positive responses encouraged me to head the direction of more challenging designs.  I learned that when you create special pieces, you differentiate yourself from the oceans of jewelry out there.  It is much more rewarding than making generic jewelry.  One very fun result is that my Dahlia was selected for all the show marketing materials for the KPFA Crafts Fair.  Now, that's marketing that no money can buy - at least not with my non-existing marketing budget.  :)

My resolutions for 2013:

1.  My production plan is to come up with a cohesive line of about 40 to 45 pieces.  The goal is BMAC 2014, the big wholesale show in Philly.  High fees, but an excellent motivator for me to sit at my bench and work hard.

2.  A new website is in order.  I want to set up an ecommerce site with a shopping cart.  I want to be able to post my show schedule and have separate gallery pages.  It will be nice to have total control of it.

Wish me luck!

Check out what my other teammates have to say about this topic:
1. Lou Hunter http://peculiarforest.blogspot.com
2. Laura Jane Bouton http://laurajanebouton.blogspot.it/
3. 2Roses: http://www.jewelrytutorial.blogspot.com
4. deborahleetaylor: http://www.e5jewelryblog.com
5. Mary Anne Karren: http://silverpearlmetalworks.wordpress.com/
6. Danielle Miller: http://daniellemillerjewelry.blogspot.com/
7. Nodeform : http://nodeform.blogspot.com/
8. Silentgoddess: http://silentgoddess.blogspot.com

Monday, May 7, 2012

EtsyMetal Blog Carnival - May 2012, Unconventional Tool

It's EtsyMetal's Blog Carnival again.  The team chooses one topic that we would write about for the first Monday of the month.  This month's topic is "The Unconventional Tool", tool(s) that I either made myself, items that were not intended to be used by a metalsmith, tell about it and describe/show the results my special tool(s) give in my creative process!


I got this little plastic disc, about 1 inch in diameter, from our local plastic shop.  I found it in the scrap bin where they discard pieces that are broken, odd ball sizes, or unpopular items.  Someone's trash is another's treasure, right?  Well, let me tell you, I can't live without it when making a bezel setting.

Before, I tried using a bezel rocker to push the bezel wall onto the cabochon. Because it is made of steel, the bezel rocker would leave marks on the thin, soft fine silver bezel.  I would have to sand it down so thin that sometimes I wonder if the bezel wire would develop a hole, showing through to the stone.


I use this plastic disc to pull or push the soft fine silver onto the cabochon without marring my bezels anymore.  Being 1 inch round, it is small, handy, and easy to maneuver.  The best part is, it is FREE - totally within my budget.  =]

See what my other teammates have to say about this topic:
1. Mary Anne Karren - http://silverpearlmetalworks.wordpress.com/
2. Laney Clark ~ http://silentgoddess.blogspot.com
3. Beth Cyr - http://bcyrjewelry.blogspot.com
4. Inbar Bareket - http://www.inbarbareket.info/blog
5. 2Roses - http://www.jewelrytutorial.blogspot.com

Monday, April 2, 2012

EtsyMetal Blog Carnival - April 2012

It's been a while since I last participated in EtsyMetal's Blog Carnival.  The team chooses one topic that we would write about for the first Monday of the month.  This month's topic is "Nobody's Perfect". 

I have to admit, I usually spend time to think and/or sketch a design before I start working a piece.  A lot of times, it works out exactly how I imagined it, but a lot of times...well, let's say, things happen.  LOL

Just the other day, I made some simple bezel set gemstone post earrings.  I didn't want to have a puddle of solder at the base of the posts, so I was being careful not to put too much solder.  I was so happy everything worked out just right, and threw the settings in the tumbler to bring a high shine to them.  I use the tumbler for 2 reasons:  to harden the posts after heating and to see if the solder joins can withstand the forces of tumbling in steel shots.  Well, they came out nice and bright, and I went ahead and set the stones.  Well, lo and behold, one of the posts snapped off when I did a final test by tugging gently with pliers.
Aquamarine Post Earrings
Well, I know that once the stone is set, I can't introduce heat anymore.  So what to do?

Aquamarine Earring turned into a Pendant
I refinished the back of the earring where the post came off and made it into a matching pendant.  The jump ring bail was carefully soldered close while I put the stone, face down on a heat sink pad.  After that, I made a new single earring for replacement.  This turned out quite well, so I made another matching set using garnets.
Here are the 2 matching sets of earrings and pendants.
Lessons learned here are:
  • Use a little more solder than the snippets I cut 
  • Test the earring posts thoroughly before setting the stones
  • As makers, we have to remain open with our designs and adapt with surprise accidents.
See what my other teammates have to say about this topic:
1. Silentgoddess - http://silentgoddess.blogspot.com
2. Gracebourne - http://gracebourne.blogspot.com/
3. 2Roses - http://jewelrytutorial.blogspot.com
4. Inbar Bareket - http://www.inbarbareket.info/blog
5. Anne Walker - http://creativeinclinations.blogspot.com/
6. Beth Cyr - http://bcyrjewelry.blogspot.com
7. wildflowerdesigns - http://wildflowerdesigns.blogspot.com
8. Michele Grady Designs- http://michelegradydesigns.blogspot.com
9. Evelyn Markasky - http://markasky.blogspot.com/

Monday, March 26, 2012

Savanna's Ring - Process Photos

Another commissioned piece I finished couple of days ago.  The red to red-brown iron oxide crystals in this lepidocrocite seem to have suspended in quartz, frozen in time.  Due to the faceted top, a simple straight silver bezel is used to capture the stone.
Lepidocrocite Ring
From left to right, top to bottom:
1.  Here are all the materials I used - recycled sterling silver sheet, and rectangular wire for the band, recycled fine silver for the bezel, and the lepidocrocite.
2.  I made the bezel and soldered it to the flat sheet to create a cup for the stone, and I soldered the rectangular wire for the ring band.
3.  The parts are prepolished.
4.  The ring setting is now soldered onto the band. 
5.  A look at the back where I signed the piece and stamp the metal fineness.
6.  I blackened parts of the ring with an oxidizer.
7.  Some of the darkened areas are brushed away, and the brushing created the final texture
8.  The inside face of the band is polished to a high shine.
9.  I set the stone and pushed the bezel down so it will hug the stone.

And here's the finished ring.  Ta Da!!!
Savanna's Lepidocrocite Ring

Tuesday, February 28, 2012

Savanna's Pendant - Process Photos

This is a commissioned piece for Savanna.  I visited her in downtown San Francisco on the same day that Vice President Joe Biden decided to come join our party.  Well he was in town for a fundraiser lunch, which of course caused major traffic jams and detours.

Savanna chose this picture type jasper where it looks like someone painted some red blooms across a gray canvas.  So pretty and definitely unique.  With the long rectangular shape of the stone, we decided to reiterate that shape with rectangles and squares.  Placing the toggle clasp in the front not only reflects the organic shape of the brick red inclusions, but also makes it more convenient to wear.  I promised Savanna I will take progress pictures so she can see the step by step process.  Below the photos are some general, less technical descriptions:

From top to bottom and left to right:
1.   raw materials - recycled sterling sheet, recycled fine silver bezel wire, and the jasper cab
2.   measuring and fitting the bezel wire for the stone and solder the ends together
3.   solder the bezel onto a piece of the sterling backing that I cut from the big sheet
4.   I then sawed out part of the back because I want to have the back of the cab showing
5.   here it is, back is cut
6.   I have to keep checking to make sure the stone still fits
7.   and this is how the stone looks from the back
8.   I file the sawn edges smooth - first the inside rectangle on the backing
9.   then I use a larger file for the outside edges
10. cut the decorative square holes
11. drill a hole for a jump ring to later attach the ring part of the toggle clasp, and sand the metal smooth
12. looking from the back
13. toggle and chain attached, patina applied
14. signed the piece and quality stamped it with "STER"
15. all ready to set the stone and pushing the bezel against it
16. voila - finished

Here's a closer look at the finished pendant:
Front 


Back
I will be making her ring next.  She chose a lepidocrocite quartz with faceted top.  Come back in a few days and I will post those process pictures as well.  :)